


Ballpoint pen drawing technique; a suitable pen and paper.
 |
| Selection of drawings (books) |

Table of contents:
- History and advantages
- Disadvantages
- How to hone your ballpoint pen drawing skills
- The desired effect required.
- Choosing the right ballpoint pen
- Choosing suitable paper and or drawing book
- Drawing technique and process.
 |
| A selection of drawings |
Why draw with a ballpoint pen (and not rollerball pens and or pencils).
I started drawing with ballpoint pens whilst a Fine Art student at the Michaelis School of Fine Art, University of Cape Town (SA) in 1982. Mainly for the following reasons.
The first advantage of drawing with a ballpoint pen, is being able to also draw on the reverse side and follow-on pages in a bound sketch book, without having the drawn image transferred / traced onto the next page - a carbon copy of you're drawing (the way carbon copy cheque books work) and or the ink bleeding through (as the case when drawing with a rollerball pen. Drawing with pencils requires you to draw on either separate papers and or with a cardboard in between the pages (to protect the next page and or previous drawings. The other reason being the thin lines you are able to get without ever having to sharpen the lead, as you do when drawing with pencils (very fine clutch pencils were not yet then available). You also only need one great pen, instead of a selection of different pencils - a range of pencils from the very hard to the very soft ones (H-HB-B).
 |
| Decoy duck 1st stage (blue) |
 |
| Decoy duck 1st stage (black) |
The ink in the Big ballpoint pen eventually fades (if drawing is exposed to light) - the only option is to scan the image and print on ascid-free paper. One therefore cant really sell the original drawing - this is the reason why I purchase bound sketchbooks to draw in. No loose pages that can lie around and fade with time.
You can't use a rubber, you therefore cant make serious mistakes - you therefore rely allot more on close observation of the object and or subject matter as well as the planning of the drawing.
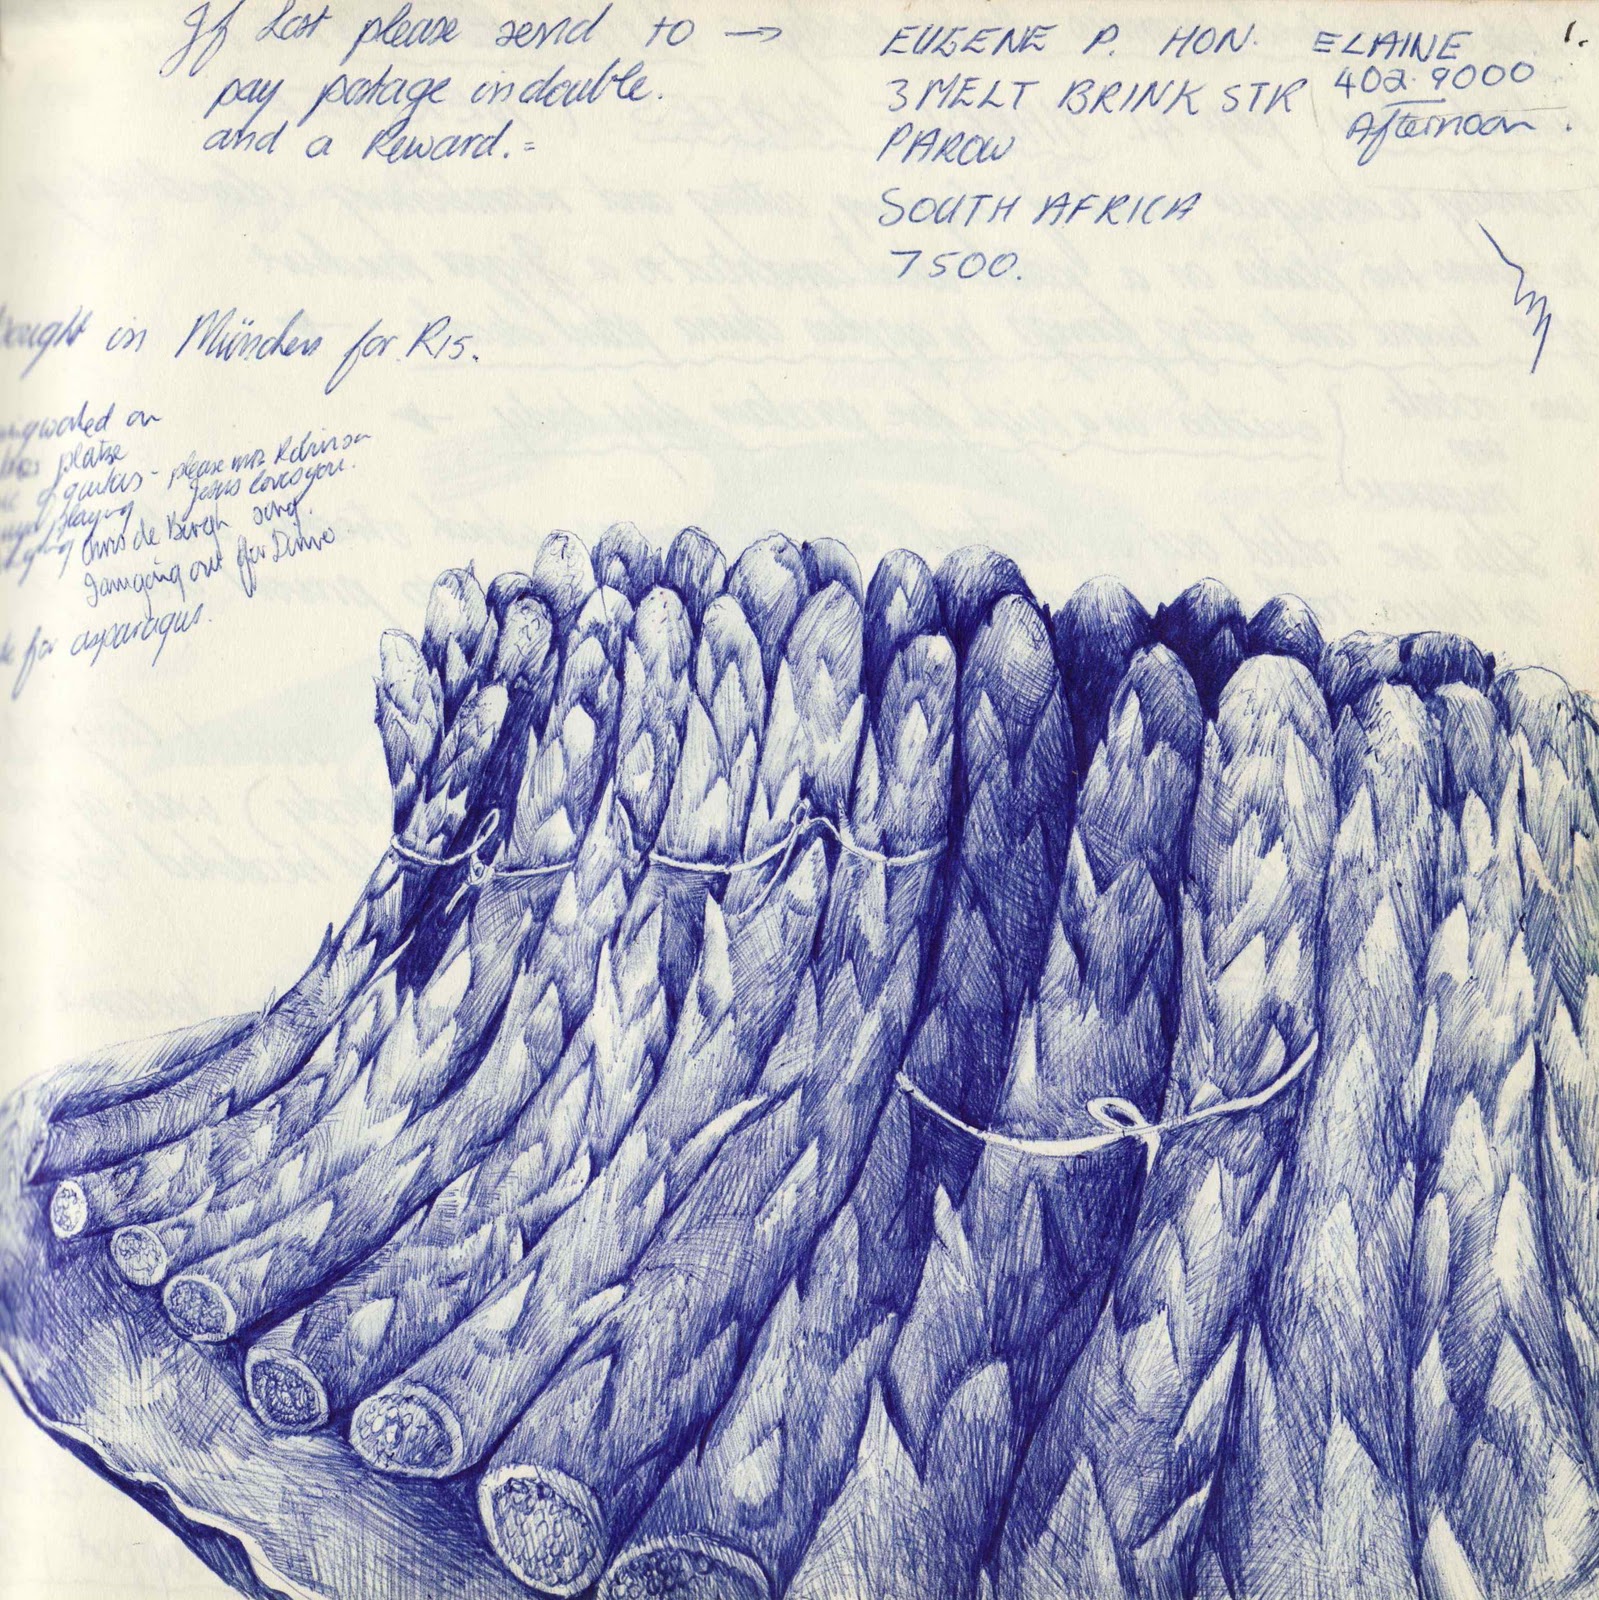 |
| Drawing of an asparagus dish, completed in 1984. Whilst on a study trip in Europe. |
 |
| Decoy duck 2nd stage (blue) |
 |
| Decoy duck 2nd stage (black) |
Achieving the right result and or the desired drawing effect depends on the right pen and suitable paper. Drawing with the normal big pens; the very cheap fine ones, allows you to crosshatch and achieve a tonal variation in the distribution of ink on paper. This is more evident when using a heavier paper - the best weight being a 150 grams, it is more absorbent and tolerant of excessive cross hatching, without pressing hard on the pen. You can build up layer upon layer of crosshatched fine lines. The oil based ink distributed onto the paper does so without warping the paper due to excessive crosshatching (rollerball pens are less tolerant). Eventually you are drawing layer upon layer of layer of ink. This is mainly achieved with a pen that does not distribute its ink too quickly; the pen slowly releases ink without having to press hard on the pen and or paper. One starts off lightly and slowly and later darker and harder to create the shadows and or desired 3 dimensional modeling effect.
 |
| Decoy duck 3rd stage (blue) |
  |
| Decoy duck 3rd stage (black) |
 |
| Decoy duck, 4th and final stage (black) I was not happy with the end result, hence the 2nd attempt in blue. |

Choosing the right ballpoint pen is of paramount importance, obviously it depends on your own preference. I require a pen that releases ink slowly and creates lines that are very fine and thin without distributing a thick blob of ink on the paper. I normally go to an art-shop and or a stationary shop, show them my drawings and ask for permission to test the Big fine pens on the shelf and or in the boxes, and by way of testing, choose the right ones - those pens that distributes the ink slowly but constantly. Only a select few of the pens release the ink slowly. Most ballpoint pens distribute ink very fast, is very dark and more than often leaves blobs of ink on the paper that smudges. You therefore have to clean the nib regularly with tissue paper after a few minutes of drawing. It is also very difficult to build up layers of fine lines and achieve a variation in tonal values - layers of fine and lighter tones.
 |
| Drawing with a rollerball pen - enlarge the drawing that will reveal the ink of the drawing on the previous page bleeding through the paper |
I have drawn on every conceivable paper; smooth, fine, various grades of textured papers, tracing papers, cartridge paper, heavy weight watercolour papers, very fine and or shiny papers including oiled newsprints, to mention a few. The most suitable paper for my drawing technique is slightly textured paper with a weight of a 150 grams. The lighter weights tend to warp - see image above. The heavy weight paper allows the ink to penetrate the paper-fibre and is strong enough to take severe crosshatching, layer upon layer of ink without damaging it. It allows you, as mentioned above, to build up layers of fine lines, drawing eventually on the previous layer of ink, its as if the surface is being burnished, polished if you like, without loosing the desired tonal value.
 |
| Decoy duck 6th stage (blue) |
 |
| Concept drawing of decoy duck. |
 |
| Using tracing paper to achieve symmetry |
Once happy with the form and symmetrical shape, I carefully transfer the image onto the right page in my sketchbook with as little damage to the paper as is possible. You don't want to create too many indentations / grooves in the paper caused by the weight of the pencil when tracing and or drawing directly.
 |
| Use a rubber to get rid of drawing marks. |
 |
| Decoy duck 6th stage (blue) |
 |
| Decoy duck 7th & final stage (blue) |


Natalie Maines Back & Foot Tattoos
Natalie Maines is an American singer-songwriter and member of country group the Dixie Chicks.
Natalie Maines is known to have three tattoos, including a star with two banners and names, located on the back of her neck.
The singer also has a small design on her right ankle, accompanied by several tiny chick foot prints on the top of her right foot, which she shares with her two fellow bandmates.


Digital Style My Tattoo My Love
Best Digital Style My Tattoo My Love

Digital Style My Tattoo My love Blue

Digital Style My Tattoo My love T shirt XXX

Digital Style My Tattoo My love Blue Eyes

Digital Style My Tattoo My love First Night ^_*

Digital Style My Tattoo My love in age 18

Best Arema, Aremanita Indonesia Tattoo My Tattoo My Love
Best Arema, Aremanita Indonesia Tattoo
My Tattoo My Love

Aremanita Tattoo My Tattoo My Love

Arema Tattoo Cool My Tattoo My Love

Aremanita Tattoo Style My Tattoo My Love

cinderella tattoo very cute for girl My Tattoo My Love

cinderella tattoo My Tattoo My Love

cinderella pink tattoo My Tattoo My Love

2 cinderella love tattoo My Tattoo My Love

Want a very cute girl tattoo ?
Be sure to follow these important guidelines for cinderella tattoo for you
Emo My Tattoo My Love


